打印明信片
本文中我们讨论如何在Objective-C代码中使用C++类。我们创建一个简单的应用程序,使用脸部照片打印出明信片。在本文中我们还学习如何测量程序的运行时间,这样可以在日后优化它。
准备
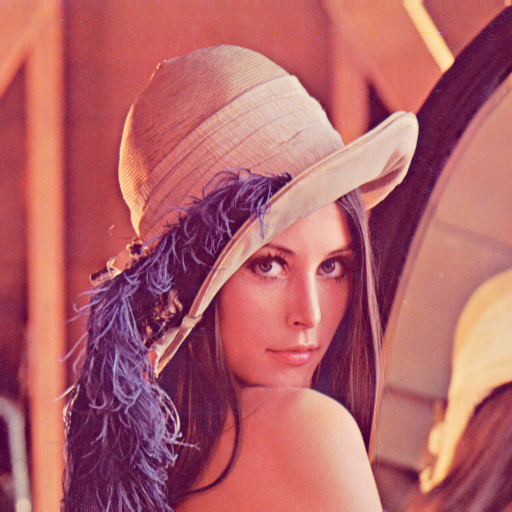
从例程工程目录中的3张图片拖到自己的工程supporting Files中
- text.png

- texture.jpg

- lena_std.tif
步骤
- 使用《Instant-OpenCV-for-iOS》-学习笔记-3的工程继续开发。
- 创建
PostcardPrinter.cpp和PostcardPrinter.hpp 在
PostcardPrinter.hpp中加入如下代码:1
2
3
4
5
6
7
8
9
10
11
12
13
14
15
16
17
18
19
20
21
22
23
24
25
26
27
28# ifndef PostcardPrinter_hpp
# define PostcardPrinter_hpp
# include "opencv2/core/core.hpp"
class PostcardPrinter
{
public:
struct Images
{
cv::Mat face;
cv::Mat texture;
cv::Mat text;
};
PostcardPrinter(Images images);
void print(cv::Mat& postcard) const;
private:
void crumple(cv::Mat& image, const cv::Mat& texture,
const cv::Mat& mask = cv::Mat()) const;
void alphaBlend(const cv::Mat& src, cv::Mat& dst,
const cv::Mat& alpha) const;
Images images_;
};
# endif /* PostcardPrinter_hpp */
在
PostcardPrinter.cpp中添加如下代码实现在PostcardPrinter类中声明的print、crumple、alphaBlend等方法:1
2
3
4
5
6
7
8
9
10
11
12
13
14
15
16
17
18
19
20
21
22
23
24
25
26
27
28
29
30
31
32
33
34
35
36
37
38
39
40
41
42
43
44
45
46
47
48
49
50
51
52
53
54
55
56
57
58
59
60
61
62
63
64
65
66
67
68
69
70
71
72
73
74
75
76
77
78
79#include "PostcardPrinter.hpp"
#include "opencv2/imgproc/imgproc.hpp"
using namespace std;
using namespace cv;
PostcardPrinter::PostcardPrinter(Images images)
{
images_ = images;
}
void PostcardPrinter::print(Mat& postcard) const
{
// Prepare postcard
int border = 50;
int bottomBorder = border * 4;
cv::Size postcardSize = cv::Size(images_.face.cols + 2 * border,
images_.face.rows + border + bottomBorder);
resize(images_.texture, postcard, postcardSize);
// Choose places for face and text
cv::Point shift(border, border);
cv::Rect faceRoi = cv::Rect(shift, images_.face.size());
Mat placeForFace = postcard(faceRoi);
cv::Point origin(border, images_.face.rows + border);
cv::Rect textRoi(origin + shift, images_.text.size());
Mat placeForText = postcard(textRoi);
// Add crumpled face
Mat crumpledFace = images_.face.clone();
crumple(crumpledFace, placeForFace);
crumpledFace.copyTo(placeForFace);
// Get text's alpha channel
vector<Mat> textPlanes;
split(images_.text, textPlanes);
Mat alpha = textPlanes[3];
textPlanes.pop_back();
Mat bgrText;
merge(textPlanes, bgrText);
// Add text with crumpling and alpha
crumple(bgrText, placeForText, alpha);
alphaBlend(bgrText, placeForText, alpha);
}
void PostcardPrinter::crumple(Mat& image, const Mat& texture,
const Mat& mask) const
{
Mat relief;
cvtColor(texture, relief, CV_BGR2GRAY);
relief = 255 - relief;
Mat hsvImage;
vector<Mat> planes;
cvtColor(image, hsvImage, CV_BGR2HSV);
split(hsvImage, planes);
subtract(planes[2], relief, planes[2], mask);
merge(planes, hsvImage);
cvtColor(hsvImage, image, CV_HSV2BGR);
}
void PostcardPrinter::alphaBlend(const Mat& src, Mat& dst,
const Mat& alpha) const
{
for (int i = 0; i < src.rows; i++)
for (int j = 0; j < src.cols; j++)
{
uchar alpha_value = alpha.at<uchar>(i, j);
if (alpha_value != 0)
{
float weight = float(alpha_value) / 255.f;
dst.at<Vec3b>(i, j) = weight * src.at<Vec3b>(i, j) +
(1 - weight) * dst.at<Vec3b>(i, j);
}
}
}在ViewController.mm中的viewDidLoad方法中添加如下代码:
1
2
3
4
5
6
7
8
9
10
11
12
13
14
15
16
17
18
19
20
21
22
23
24
25
26
27
28
29
30
31
32
33
34
35
36
37
38
39
40
41
42
43
44
45
46
47
48
49
50
51
52
53
54#import "ViewController.h"
#import "PostcardPrinter.hpp"
@interface ViewController ()
@end
@implementation ViewController
@synthesize imageView;
- (void)viewDidLoad {
[super viewDidLoad];
// Do any additional setup after loading the view, typically from a nib.
PostcardPrinter::Images images;
NSString* filePath = [[NSBundle mainBundle]
pathForResource:@"lena_std" ofType:@"tif"];
UIImage* image = [UIImage imageWithContentsOfFile:filePath];
UIImageToMat(image, images.face);
//FIXME: delete this
resize(images.face, images.face, cv::Size(512, 512));
filePath = [[NSBundle mainBundle]
pathForResource:@"texture" ofType:@"jpg"];
image = [UIImage imageWithContentsOfFile:filePath];
UIImageToMat(image, images.texture);
cvtColor(images.texture, images.texture, CV_RGBA2RGB);
filePath = [[NSBundle mainBundle]
pathForResource:@"text" ofType:@"png"];
image = [UIImage imageWithContentsOfFile:filePath];
UIImageToMat(image, images.text, true);
PostcardPrinter postcardPrinter(images);
cv::Mat postcard;
int64 timeStart = cv::getTickCount();
postcardPrinter.print(postcard);
int64 timeEnd = cv::getTickCount();
float durationMs =
1000.f * float(timeEnd - timeStart) / cv::getTickFrequency();
NSLog(@"Printing time = %.3fms", durationMs);
if (!postcard.empty())
imageView.image = MatToUIImage(postcard);
}
- (void)didReceiveMemoryWarning {
[super didReceiveMemoryWarning];
// Dispose of any resources that can be recreated.
}
@end
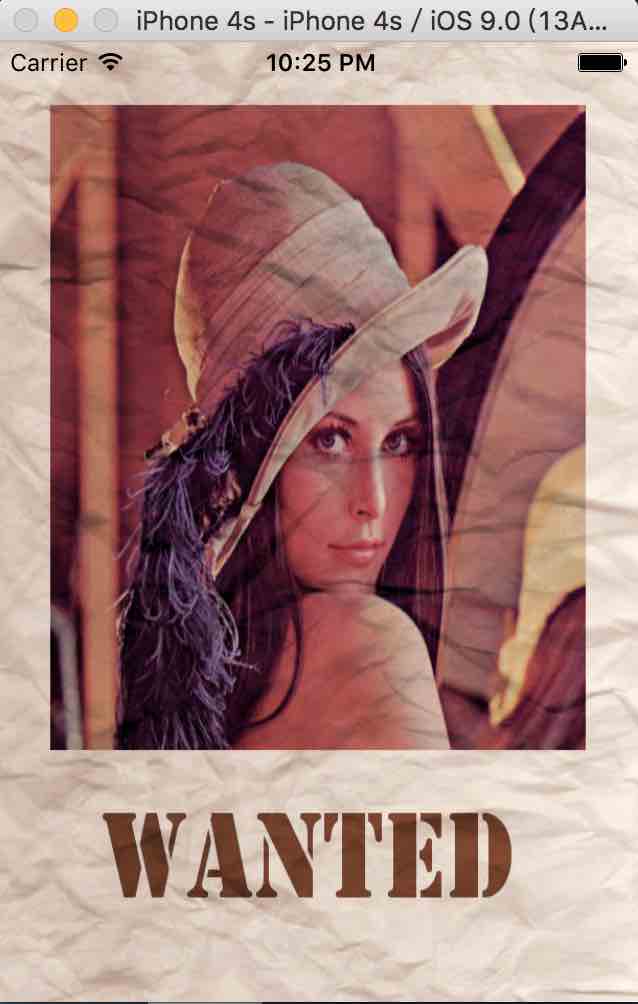
- CMD+R 得到效果如下图:
解释
PostcardPrinter是一个可以用在桌面程序的C++类,他简单调用了一些OpenCv函数。其中crumpling方法是用于改变图像的强度值(intensity),而这些操作都需要在HSV色彩空间中完成。首先将texture图像转为灰度图存入relief,然后用image的强度通道值(HSV的value通道)减去relief。UIImageToMat(image, params.text, true);表示转换成带alpha通道的Mat。OpenCV中有getTickCount和getTickFrequency函数用于测量时间,评估软件性能。乘上1000后的时间单位是毫秒ms1000.f * float(timeEnd - timeStart) / cv::getTickFrequency();- 时间的差值要控制在0.5秒内。一般不直接使用
getTickCount函数,而是使用宏:1
#define TS(name) int64 t_##name = cv::getTickCount()
     #define TE(name) printf("TIMER_" #name ": %.2fms\n", \
       1000.*((cv::getTickCount() - t_##name) / cv::getTickFrequency()))